If you’ve ever ordered a custom cap mold from a supplier, only to deal with seals that leak, threads that cross-thread mid-run, or cycles that run 20% slower than quoted, you know performance isn’t just a buzzword—it’s the difference between a packaging line that hits production targets and one that’s stuck in maintenance. As a cap mold supplier with 12 years of on-the-floor experience supporting beverage, pharmaceutical, and personal care brands, I’ve seen hundreds of molds fail not because they were poorly made, but because their performance testing was rushed, unstandardized, or completely skipped. Today, I’m walking you through the step-by-step testing protocol we use in our shop to validate every cap mold before it ships—no fancy, un replicable lab equipment required, just real-time testing that mirrors what you’ll actually see on your production floor. Cap Mold

Let’s start with why testing a cap mold isn’t just a pre-shipment checkbox. A cap mold’s performance relies on a mix of material science, machine sync, and design precision. Even a mold that’s machined to within 0.001mm tolerances can have hidden flaws: a draft angle that’s too steep for HDPE (high-density polyethylene) but fine for PP (polypropylene), a cooling channel that’s blocked, or a split line that’s slightly misaligned so caps have burrs that snag on capping machines. Cut corners on testing, and you’ll be looking at downtime, scrap parts, and unexpected tooling repairs that eat into your profit margins before your first production run even wraps the first shift.
Pre-Production: Static Validation (Before You Even Touch Plastic)
The first round of testing happens before any resin touches the mold core—this is the “proof it’s built right” phase, and it’s the most overlooked step by new suppliers cutting costs. We call this static testing, and it covers three non-negotiable checks: dimensional accuracy, structural integrity, and core alignment.
First, dimensional testing. Every cap is made to a specific standard: whether it’s a 28mm PCO 1810 soda cap, a child-resistant pharmaceutical cap, or a 58mm personal care pump cap. For our molds, we don’t just measure a few random caps off a pilot run—we use a coordinate measuring machine (CMM) to scan the entire mold cavity and core, checking every critical dimension: thread pitch, sealing surface diameter, height, split line gap, and undercut depth. For example, a PCO 1810 cap has a maximum allowable thread deviation of ±0.002mm; even a 0.003mm shift can make a cap that leaks carbonation or cross-threads on your capper. We also test split line flatness—any gap larger than 0.001mm will leave a burr that can clog your production line’s trim stations.
Next, structural integrity. A mold has to withstand millions of injection cycles—think 5,000 hours of production for a high-volume beverage line. We test this by performing a pressure and endurance test without resin: we inject hydraulic fluid into the mold’s cavity at 150% of its operating pressure for 10,000 cycles. Why hydraulic fluid? It mimics the pressure of molten plastic without wasting resin. After the test, we scan the mold for micro-cracks or deformation with a precision surface scanner. Last year, a customer came to us with a mold from a overseas supplier that developed a crack after just 200,000 cycles; our static pressure test would have caught that during pre-shipment, saving them $15,000 in downtime and scrapped caps.
Finally, core alignment testing. This is where most mold flaws hide: if the core pin (the part that forms the inside of the cap) is even slightly off-center, the cap wall will be thinner on one side, leading to weak spots that crack during capping or leak after filling. We use a dial indicator to measure core runout at 10 different points around the cavity. Acceptable runout is less than 0.002mm for standard caps; anything higher will result in inconsistent wall thickness that fails leak testing. We also check that the core retracts smoothly with a light touch—no sticking that would cause part distortion during ejection.
The Real Test: Pilot Production Testing (With Actual Resin)
Static checks only tell you half the story. A mold that passes all static tests can still fail when you put molten plastic through it—plastic shrinkage, flow dynamics, and cooling time all impact performance. Our pilot testing uses the exact resin the customer will run on their line, at the exact temperature and pressure they specify. We run three key tests here: part consistency, cycle time validation, and ejection ease.
First, part consistency testing. We run 500 consecutive caps, marking every 50th one for testing, then validate them for four key attributes: weight, seal integrity, and cosmetic finish. Weight is critical because it directly impacts material cost—off by even 0.5 grams per cap adds $50,000 in annual material costs for a line making 1 billion caps a year. We use a precision scale to check each sample, ensuring weight stays within ±0.03 grams of the target. Seal testing is non-negotiable for food, beverage, and pharmaceutical caps. We use a leak tester that applies vacuum pressure to the inside of the cap and measures for air ingress; a good cap will hold a 20-inch Hg vacuum for 10 seconds without dropping. For carbonated beverages, we also test internal pressure resistance: we pressurize caps with 4 bar of CO2 for 24 hours and check for leaks or deformation. Cosmetic finish matters too—any flow marks, burrs, or sink marks will get rejected by your quality control team, and fixing them mid-production is costly. We inspect every sample under 10x magnification to catch even tiny surface flaws.
Next, cycle time validation. This is where a good mold becomes a great mold. The cycle time is the total time from mold closure to part ejection, and every second saved adds up over a year. For example, a beverage line running 2 million caps a day can increase output by 144,000 caps per year if cycle time is reduced by 0.1 seconds. We run our pilot tests at the customer’s specified machine settings, then optimize for consistency without sacrificing part quality. We never cut cycle time to hit a target if it results in part distortion or ejection issues. Last quarter, a craft brewery customer asked us to cut cycle time on their 38mm beer cap from 12 seconds to 10 seconds; our test showed that a 0.5 second increase in cooling time (adjusting the mold’s water flow channels) let us hit 10.8 seconds without a single defective part, balancing speed and quality. We also run the cycle for 1,000 consecutive shots to ensure no slowdown from cooling line blockages or hydraulic pressure drops—flaws that often show up after the first 500 cycles.
Finally, ejection testing. If a cap sticks in the mold during ejection, it will jam your line and cost hours of downtime. We test ejection force: the amount of pressure required to push the cap out of the cavity and core. For standard caps, ejection force should be less than 500 Newtons; anything higher means the draft angle is wrong, or cooling is uneven, causing the plastic to shrink too tightly to the mold. We also test ejection consistency—running 1,000 shots and checking that no more than 1% of caps require more than 500 Newtons to eject. If a cap sticks, we can adjust the ejection pins, polish the cavity surface, or fine-tune the draft angle during pre-shipment, so your line won’t have to deal with jams on day one.
Endurance Testing: Simulating Months of Production in Days
The final step in our testing is endurance testing, which mimics months of 24/7 production in a 48-hour test. For high-volume molds (1 million+ cycles), we run the mold at 110% of its standard cycle speed for 48 hours, producing over 100,000 caps. We monitor three key metrics throughout the test: mold temperature consistency, part defect rate, and wear on critical parts like ejection pins and core pins.
Temperature consistency is critical because uneven cooling causes part distortion and inconsistent shrinkage. We install 8 temperature sensors in the mold’s core and cavity, tracking every 10 seconds during the endurance test. If any temperature point varies by more than 2°C, we adjust the cooling channels before the mold ships—this is the number one cause of long-term part inconsistency in production. We also track defect rates over time: during the first 10,000 cycles, defects might be slightly higher as the mold breaks in, but after 50,000 cycles, the defect rate should drop to less than 0.1%. If it stays higher, that’s a sign of poor mold finish or dimensional flaws that will get worse over time.
At the end of the 48-hour endurance test, we disassemble the mold and inspect all moving parts for wear. Core pins, ejection pins, and split line surfaces should show no measurable wear after 100,000 cycles. If we see scratches or deformation, we polish or replace parts before shipping—so you don’t have to replace parts 6 months after you take delivery.
Common Mistakes We See With Poorly Tested Cap Molds
Over the years, we’ve worked with dozens of customers who bought molds that skipped these tests, and the mistakes are always the same. One customer in the personal care industry bought a cheap mold that only passed visual inspection—their caps had a 1.2% leak rate because the sealing surface was 0.005mm out of alignment, a flaw that would have been caught in our dimensional testing. Another beverage customer skipped endurance testing, and their mold developed a core pin crack after just 80,000 cycles, forcing them to pay $8,000 for emergency tooling repairs and 3 days of downtime. The worst was a pharmaceutical company whose mold had a split line gap that left micro-burrs on child-resistant caps; the burrs made the caps impossible to open for elderly users, leading to a product recall and $200,000 in fines.
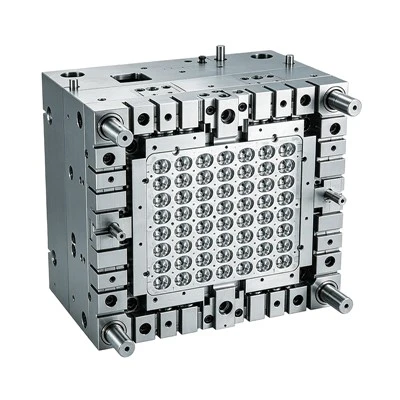
These mistakes are completely avoidable with a proper testing protocol. The key is that testing isn’t just about checking boxes—it’s about validating that the mold will perform exactly as promised on your line, with the resin you use, at the speed you need.
Ready to Get a Mold That Works For Your Line?
Medical Injection Mold At the end of the day, a cap mold is a long-term investment, not a one-time purchase. A well-tested mold will run for 5+ years with minimal downtime, reduce scrap rates to less than 0.1%, and hit your production targets from day one. The testing process we use is built on 12 years of working directly with production teams, not just engineering teams—we know what matters on the floor, not just in a lab. If you’re in the market for a new cap mold, or you’re tired of dealing with molds that underperform and cause downtime, reach out to us to discuss your requirements. We’ll share our full test report template, run a mock pilot test with your resin, and make sure your mold passes every performance check before it leaves our shop. Because for us, the test doesn’t end when the mold ships—it starts when you run your first production shift.
References
- Rosato, D. V., & Rosato, M. G. (2000). Injection Molding Handbook (3rd ed.). Kluwer Academic Publishers.
- Manufacturing Engineering Society International Conference (MESIC). (2018). "Precision Testing and Quality Control of Injection Molds for Packaging Applications." Procedia Manufacturing, Vol. 26, pp. 1129-1137.
- Groover, M. P. (2020). Fundamentals of Modern Manufacturing: Materials, Processes, and Systems (7th ed.). Wiley.
Taizhou Koni Mould Co., Ltd.
As one of the most professional cap mold manufacturers and suppliers in China, we also support customized service. Please feel free to wholesale high quality cap mold made in China here from our factory. For pricelist, contact us now.
Address: No. 97 Jinju Road, Chengjiang Subdistrict, Huangyan District, Taizhou City, Zhejiang Province
E-mail: kn@kenimould.com
WebSite: https://www.kenimouid.com/
